I’m often asked to design customer and employee tracking systems. There are quite a few ways to do it, and it’s an interesting intersection of engineering and ethics – what information is reasonable to collect in different contexts, anonymizing and securely storing it, and at a fundamental level whether the entire system should exist at all.
On one end of the spectrum, a system that simply counts the number of people that are in your restaurant at different times of day is pretty innocuous and allows you to offer better service. On the other end, when you don’t pay for a mobile app, generally that means your private data is the product being bought and sold. Personally, I find that the whole ‘move fast and break things’ attitude, along with a general disregard for the privacy of user data, has created a pretty toxic tech scene. So until a short while ago, I refused to build invasive tracking systems – then I got a request that I simply couldn’t put aside…
A friend working with a large agricultural firm wanted an injectable RFID system to track pigs from birth to slaughter. I laid out the system architecture next to what I had from various proposed consumer tracking systems. I looked from pig to consumer, then consumer to pig again, and true to Orwellian archetype, it was impossible to say which was which. One thing was clear: I was going to waive my fee and build some demo hardware… I was too amused to do otherwise!
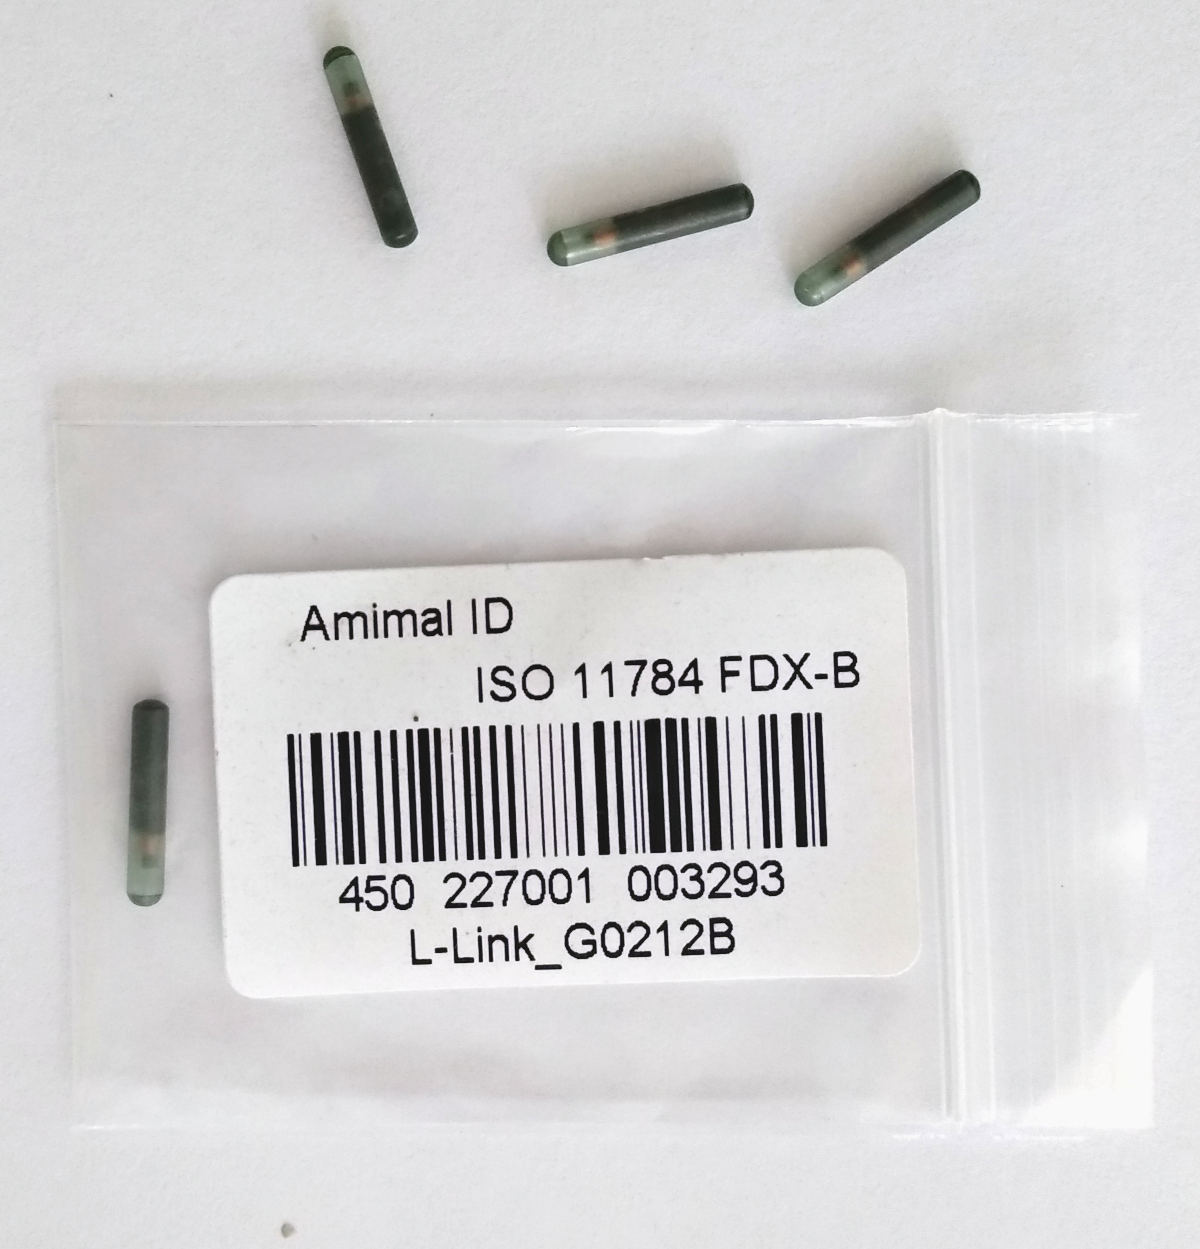
Many of you will have heard of injectable RFID tags from news articles describing someone implanting themselves with one to open car doors or similar. Fundamentally, these are tiny RFID chips tightly wrapped with a coil of wire, and encapsulated in an inert package a bit larger than a grain of rice. Most of the devices on the market are rated for veterinary use only and are very inexpensive, although there are some rated for human use as well. If you’re into that sort of thing, then you’re sort of building a livestock tracking system for yourself (or perhaps a pet), and some of the below might be useful for you!
Understanding Tracking Implants
Unlike the 13.56MHz NFC / RFID systems you might be familiar with, these implantable systems for pets and livestock generally work off a 125kHz carrier frequency. They also have their own communication standard defined, ISO 11784. I saw only a couple of higher frequency tags available, so I went and bought the cheapest/finest reader and a few low frequency injectable tags available on Taobao. I ended up with something vaguely like this, but with more unlabeled ICs. Note that for human use, you probably won’t want the injectable tags I use here as they don’t support encryption or NFC.
The reader was not a terribly impressive device – a raw board with a magnet wire antenna that breaks off easily, needing to be resoldered during testing. It provides output as 9600 baud serial communications. I had a WeMos ESP8266 development board with NodeMCU loaded lying around, and chose to use that to manage the device.
The hardest part here turned out to be the serial port needing to switch between two baud rates for loading code to the ESP8266 and for receiving data from the implantable tag reader. On boot, the ESP8266 expects to communicate at 115200 baud, and executes anything sent to it over the serial port. When receiving data from the reader, it needs to run at 9600 baud, and definitely not execute anything received… because ‘file.format’ is a cute name for a pig and we’ll want to support that. Since I’ll want to connect the device to the Internet later on, we accomplish this by keeping the default serial port settings while the device connects to Wi-Fi:
-- Connection parameters
wifi.setmode(wifi.STATION)
wifi.setphymode(wifi.PHYMODE_B)
station_cfg={}
station_cfg.ssid="SSID here"
station_cfg.pwd="password here"
station_cfg.save=true
wifi.sta.config(station_cfg)
wifi.sta.connect()

-- Only run serial monitor once connected
mytimer = tmr.create()
mytimer:register(1000, tmr.ALARM_AUTO, function() if wifi.sta.getip()==nil then print("Connecting...") else dofile('serial.lua') end end)
mytimer:start()
Then after a Wi-Fi connection is established, we use the code below in a file named ‘serial.lua’ to switch the serial port settings so that it works at 9600 baud, and won’t try to execute anything received. We then start scanning:
-- initialize serial port to run at 9600 baud and not execute input
uart.setup(0, 9600, 8, uart.PARITY_NONE, uart.STOPBITS_1, 0)
print("Scanning")
data = ""

-- When serial data comes in, the data is preceded by an octothorpe, and split into two lines separated by a newline character. Strip those out.
uart.on("data", "#",
    function(data)
    data = string.gsub(data, "#", "")
    data = string.gsub(data, "n", "")
    print(data)
    data = ""
    end, 0)
This creates a workflow roughly as follows, which I follow every time I’ve got a serial device to connect to an ESP8266:
- Set the baud rate of Esplorer to 115200
- While the device is connecting to Wi-Fi, send file.remove(“init.lua”) to the device and reset
- Load updated code to the device (init.lua and serial.lua)
- Set the baud rate of Esplorer to 9600 and reset
- See what happens, repeat as needed
When we now bring an implantable tag in contact with the reader, it correctly outputs the ID stored on it. The first thing I noticed is that it has a very short range – even shorter than a 13.56MHz RFID access card: a tag has to exactly touch the antenna to be read, and sometimes it takes two or three tries. Part of that is probably the questionable quality of my reader and tags, however the tiny antenna in the implantable tag is unlikely to compare favorably to the larger and better oriented antenna of an access card. Overall these implantable tags seem to be an incredibly short-range technology, even with higher frequency NFC systems.
That’s probably good news for any humans out there with these implants, because it’s harder for me to intercept communications on your device that requires surgery to remove. On the other hand, it makes it pretty useless for tracking livestock compared to the longer-range ear or ankle tags that are currently used.
Building a Prototype For the Customer to Say Yes
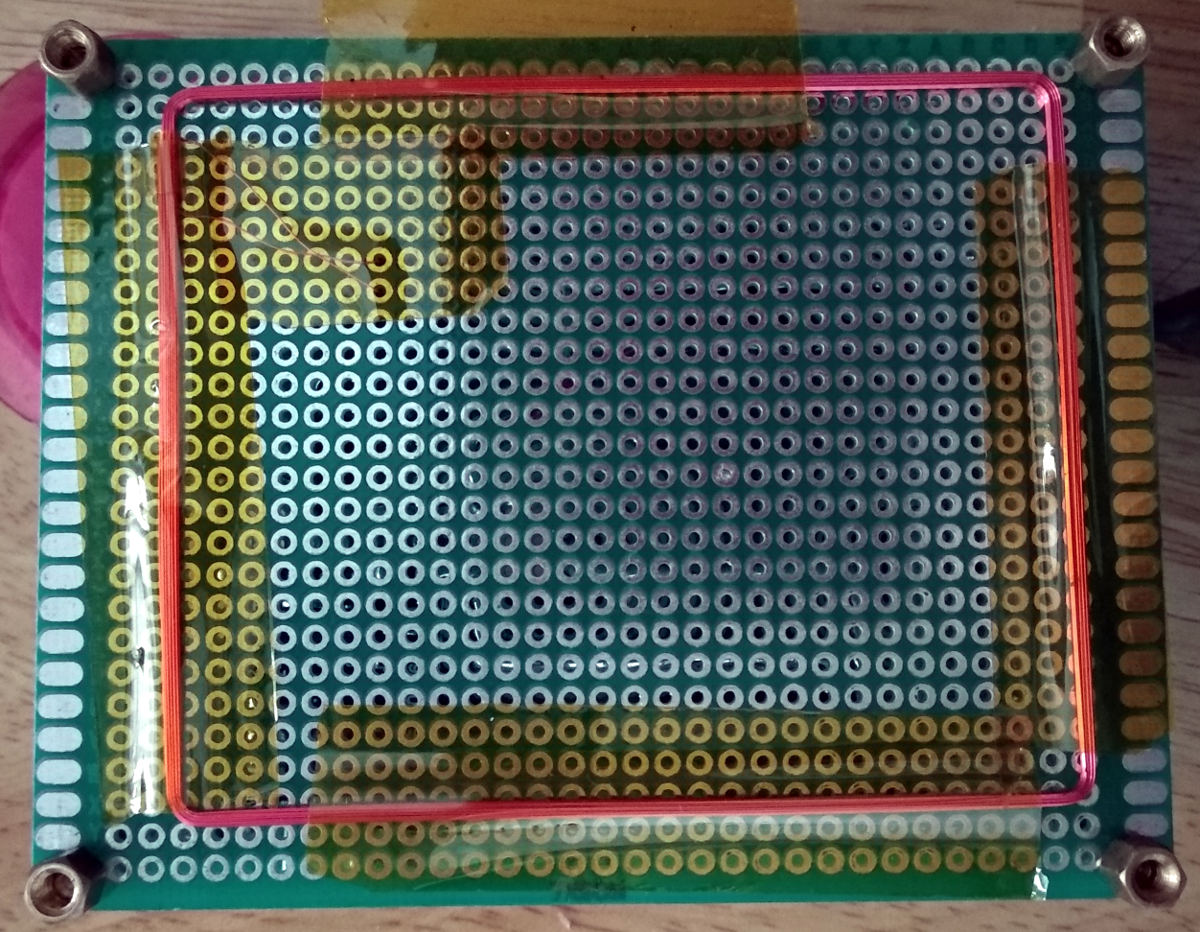
The next step was to clean it up for a demo. One thing I learned the hard way over the years, is that when someone asks you to demonstrate a prototype, they care about a very different set of things than you do. For all hardware demonstrations, I try to make the device a standalone, self-contained unit to avoid distractions. I have at a minimum a bright OLED screen, LiPo pouch cell, a USB charging circuit, and a jumper to connect power. The cell and charging circuit are trivial (it’s just a module and any spare pouch cell), and adding the OLED screen is pretty easy.
I also use two layers of green perfboard, so that solder traces are hidden, and brass spacers so it stands off whatever surface it’s on. Overall this shifts the focus from boring questions, like why it’s plugged into my computer via USB cable (just for power), to more interesting ones like performance and cost.
This Implant Is Not the Future
In the end, the prototype demonstrated that injectable RFID was not a superior way to track livestock due to the very short range of the system compared to existing solutions – the reader was fiddly even with a 0.5mm plastic spacer between it and the tag, whereas the ear and ankle tags currently used worked over tens of centimeters.
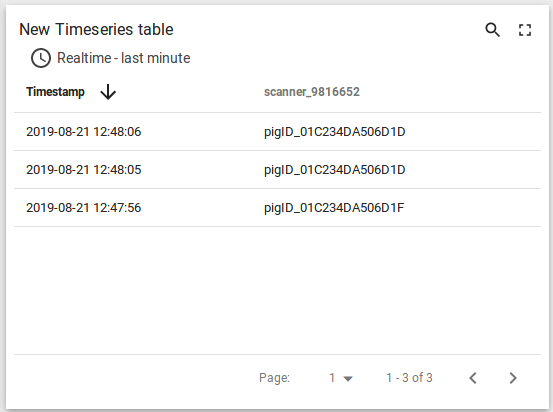
Still, I connected it to ThingsBoard because it was fun to have an Internet of Pigs device. Any suggestions on surgery-free alternate uses for my leftover injectable tags? Embedding one in an acrylic ring for low-security use comes to mind.