Even a relatively low-end desktop 3D printer will have no problems running off custom enclosures or parts for your latest project, and for many, that’s more than worth the cost of admission. But if you’re willing to put in the time and effort to become proficient with necessary CAD tools, even a basic 3D printer is capable of producing complex gadgets and mechanisms which would be extremely time consuming or difficult to produce with traditional manufacturing techniques.
Once you find yourself at this stage of your 3D printing career, there’s something of a fork in the road. The most common path is to design parts which are printed and then assembled with glue or standard fasteners. This is certainly the easiest way forward, and lets you use printed parts in a way that’s very familiar. It can also be advantageous if you’re looking to meld your own printed parts with existing hardware.
The other option is to fully embrace the unique capabilities of 3D printing. Forget about nuts and bolts, and instead design assemblies which snap-fit together. Start using more organic shapes and curves. Understand that objects are no longer limited to simple solids, and can have their own complex internal geometries. Does a hinge really need to be two separate pieces linked with a pin, or could you achieve the desired action by capturing one printed part inside of another?
If you’re willing to take this path less traveled, you may one day find yourself creating designs such as this fully 3D printed turntable by Brian Brocken. Intended for photographing or 3D scanning small objects without breaking the bank, the design doesn’t use ball bearings, screws, or even glue. Every single component is printed and fits together with either friction or integrated locking features. This is a functional device that can be printed and put to use anywhere, at any time. You could print one of these on the International Space Station and not have to wait on an order from McMaster-Carr to finish it.
With such a clever design, I couldn’t help but take a closer look at how it works, how it prints, and perhaps even some ways it could be adapted or refined going forward.
Avoiding Disappointment
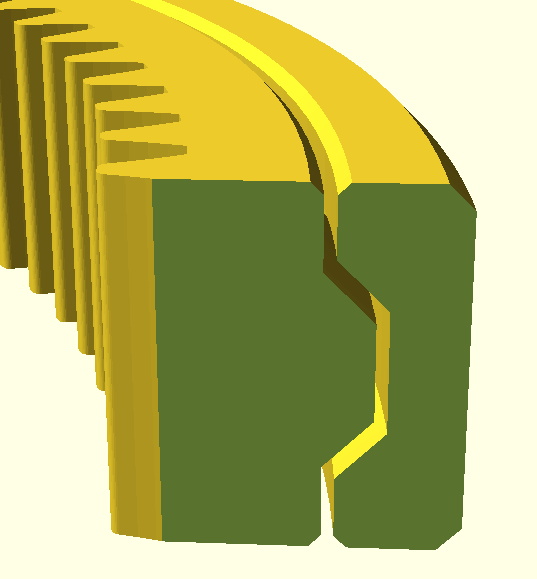
With cranks, gears, and a massive interlocking bearing assembly, you certainly couldn’t be blamed for thinking this would be a challenging print. But Brian has managed to keep the complexity of his turntable down, at least in part, by having a relatively low part count. The fact that the turntable bearing itself prints in one piece goes a long way towards this goal.

Of course, you’ll need to have a printer that’s relatively well tuned, but really that should go without saying any time you’re looking to print something more complex than a simple bracket. The trick with any print-in-place design (which is FDM parlance for a single print that incorporates moving elements) is making sure the parts don’t fuse together. So one of the major things to look out for is over-extrusion, which tends to make things thicker than they should be.
That being said, Brian has made the tolerances wide enough that even entry-level printers shouldn’t have a problem. In fact, the clearances might be a bit too forgiving. While it’s not a critical issue, I found there’s a bit more play in the rotation than seems necessary because of how much smaller the inner ring is. Beyond that, the fit on all the other components is spot on, and everything holds together with friction alone.
If there’s any major pitfall with the design, it’s that you’ll need essentially perfect first-layer adhesion when printing the bearing since a raft or brim would almost certainly cause the parts to fuse early on. The good news is that the circular outer shape is not particularly prone to curling or otherwise lifting off the bed. Unfortunately, all those teeth on the inner ring could be a stumbling block if your printer doesn’t get the initial bead of filament down cleanly.
Printing and Assembly
As mentioned previously, the major hurdle in this project is getting the bearing printed. Not only is this the hardest part to produce, but also the most time consuming. Despite all that, it’s where I would recommend starting; because if you can’t get the bearing printed out and spinning freely, then there’s no point in bothering with the rest of the parts. On my Prusa i3 MK3, it took a little over six hours to print the bearing at a layer height of 0.2 mm.

Once the bearing is out of the way, the rest of the print is really pretty smooth sailing. With as simple as the legs are I ran all three of those off at once, for a total print time of around two hours. The handle and gears each take around an hour to print, and all went off without any problems. One minor annoyance was that many of the parts are not properly oriented in relation to the bed when loaded, so you need to manually rotate them before slicing. It’s a small thing, but hopefully Brian can address it in a later update to the STLs as it does make it a bit harder for less experienced users to get good results.
While not as difficult as the bearing, you’ll likely want to slow things down a bit when you get to the “plumbing”, which is what Brian calls the piece that holds the gears. This part is not only a bit spindly, but features integrated locking mechanisms which need some special care. I dropped the layer height down to 0.1 mm and enabled automatic support generation. I probably could have improved on things a bit using the new custom support options in PrusaSlicer, but the default settings did a decent enough job and the cleanup wasn’t too bad.
Once all the parts have been printed, a task that should take you around 14 hours or so, it’s time to assemble your little pile of plastic bits into a working turntable. The process is fairly self explanatory, but if you’re unsure of anything, Brian has provided a short video that does an excellent job of visually explaining how everything is supposed to fit together.
A Personal Divergence
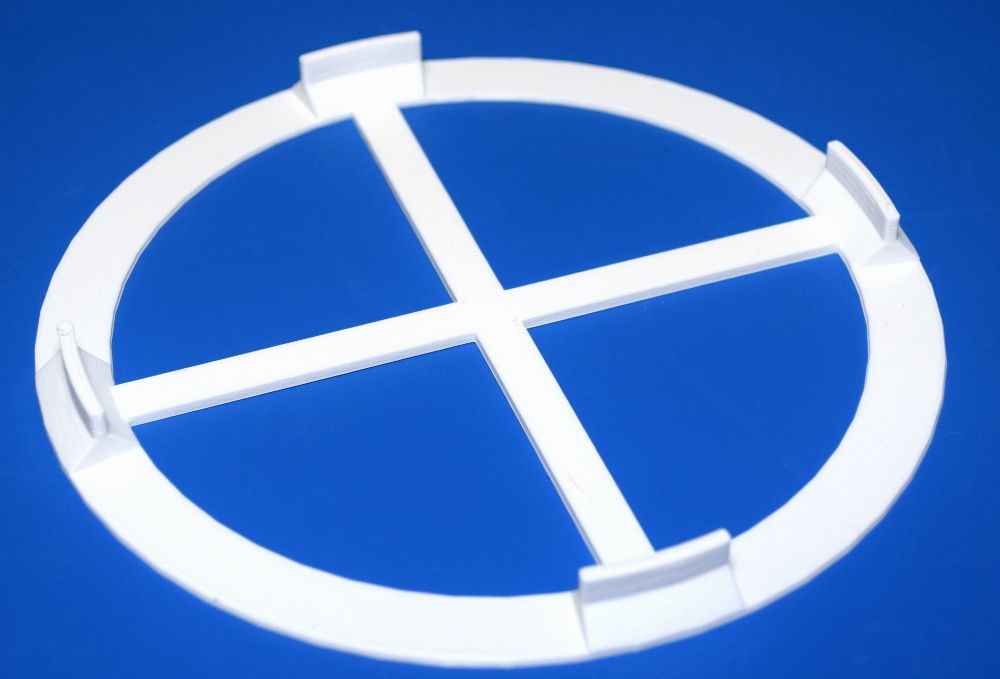
On the whole, I think Brian has done an excellent job with this design and it serves as a perfect example of how one can play to the strengths of desktop 3D printing. Still, there was one element of the design that I thought might benefit from a different approach. Originally, the turntable was to be topped with a removable plate that would have a piece of paper taped to it. Printing this solid plate would have taken over three hours given the large surface area involved. That seemed unnecessary given the fact it would be covered with paper anyway.
For my own use, I made a modification of the original top plate STL that minimizes the surface area in contact with the printer’s bed. By making the outer diameter smaller and replacing the solid center with a simple cross, I was able to reduce the print time for this piece to under an hour. Brian says he’s also looking into alternate surface geometries that could be used to reduce print time and material for this particular piece.
Scientific Spinning
Since printing this turntable, a considerable chunk of my free time has been devoting to taking videos and pictures of spinning objects. There’s something extremely satisfying about using this little gadget, knowing that you produced every component of it in-house. Many designs presented as “fully printable” often still require a few screws, bearings, or other mechanical components to complete, but not this one.
While a fun toy to play with in its current form, I’ve found myself wondering about a possible future enhancement to the design which would allow you to remove the crank assembly and replace it with a small stepper motor. This would allow for smoother rotation in videos, and put you well on the way towards an automated photogrammetry rig. I’ve mentioned the idea to Brian, so who knows, perhaps in the future this little turntable will learn some new tricks.