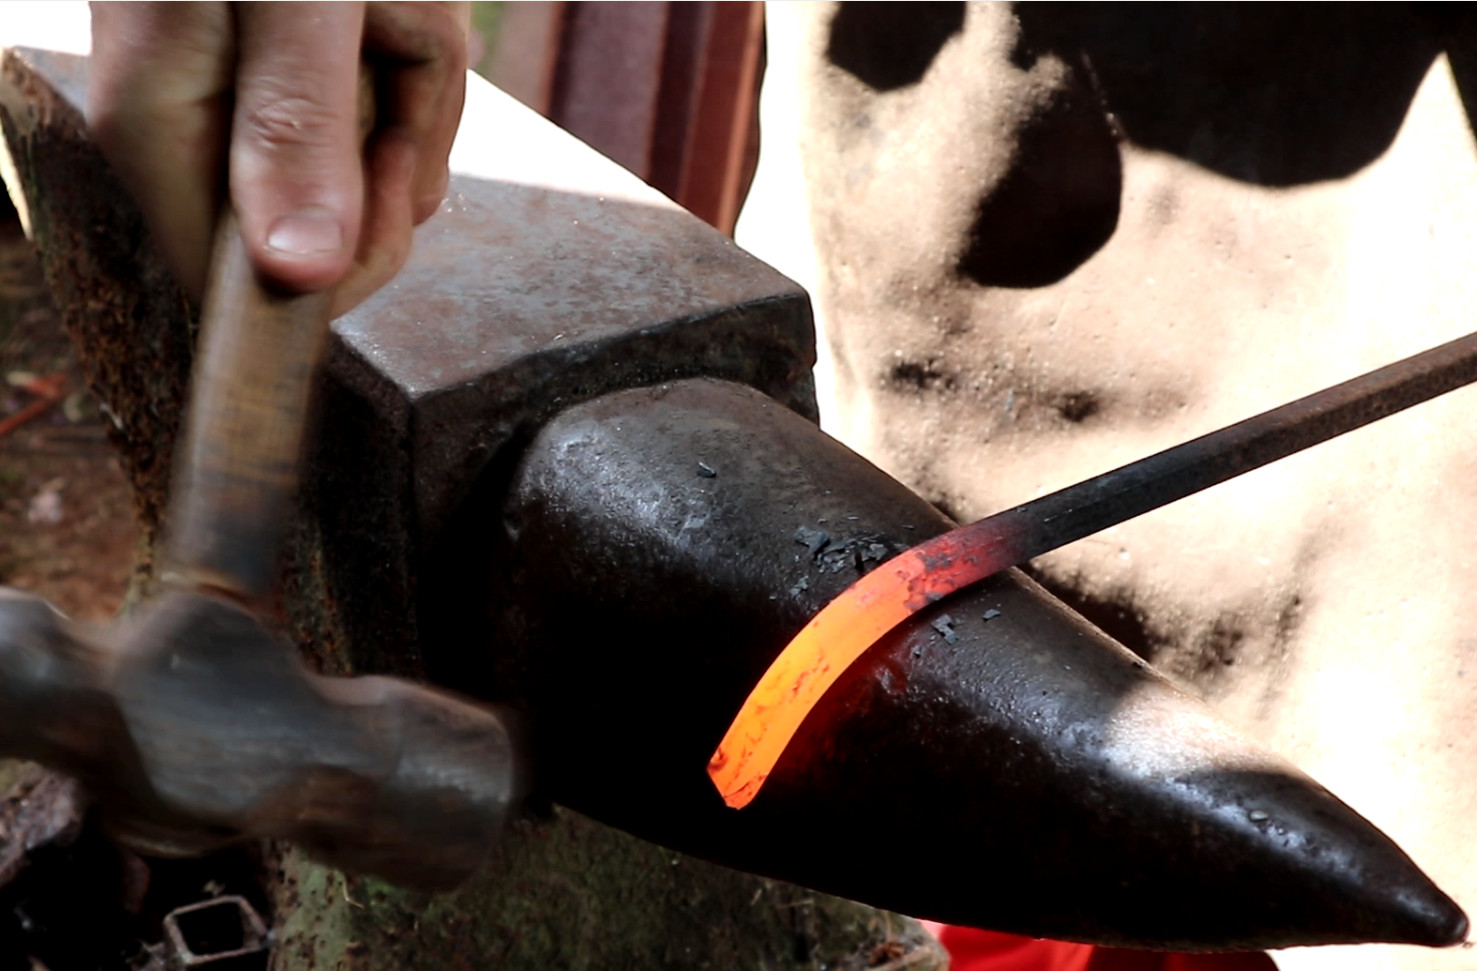
You know the funny looking side of the anvil? That’s where the best curves come from. It’s called the anvil horn and is the blacksmith’s friend when bending steel and shaping it into curves.
The principle of bending a piece of steel stock is very easy to understand. Heat it up to temperature, and hammer it over a curved profile to the intended shape. A gentler touch is required than when you are shaping metal. That’s because the intent is to bend the metal rather than deform. Let’s take a look!
Basics of Curves
Light the fire on your hearth as before, and take a piece of steel stock. I suggest a smaller size if you can get it for easier working, 8mm (3/8″) if it is available and over 500mm (20″) long to give you plenty of space for experimentation. You’ll need to position it in the heat such that 150 to 200mm (6″ to 8″) is brought to the usual orange-yellow heat.
On the anvil, place the heated part of your steel across the horn at right angles to it and hammer it over the curvature about halfway along the horn’s length. Depth of curve is controlled by moving along the horn. Working closer to the face of the anvil gives a shallower curve, towards the point gives a sharper one.
When shaping metal you hammer right on the face of the anvil like we did last time. But with curves you aren’t hammering against the anvil because this will change the shape of your work piece. Instead hammer a little distance out from the horn where your steel is in free space. Pretty quickly you’ll start to form a curve, and unless you’re very lucky you’ll probably see it also start to form a spiral. This is straightforward to rectify, simply hammer the developing spiral flat again on the face of the anvil.
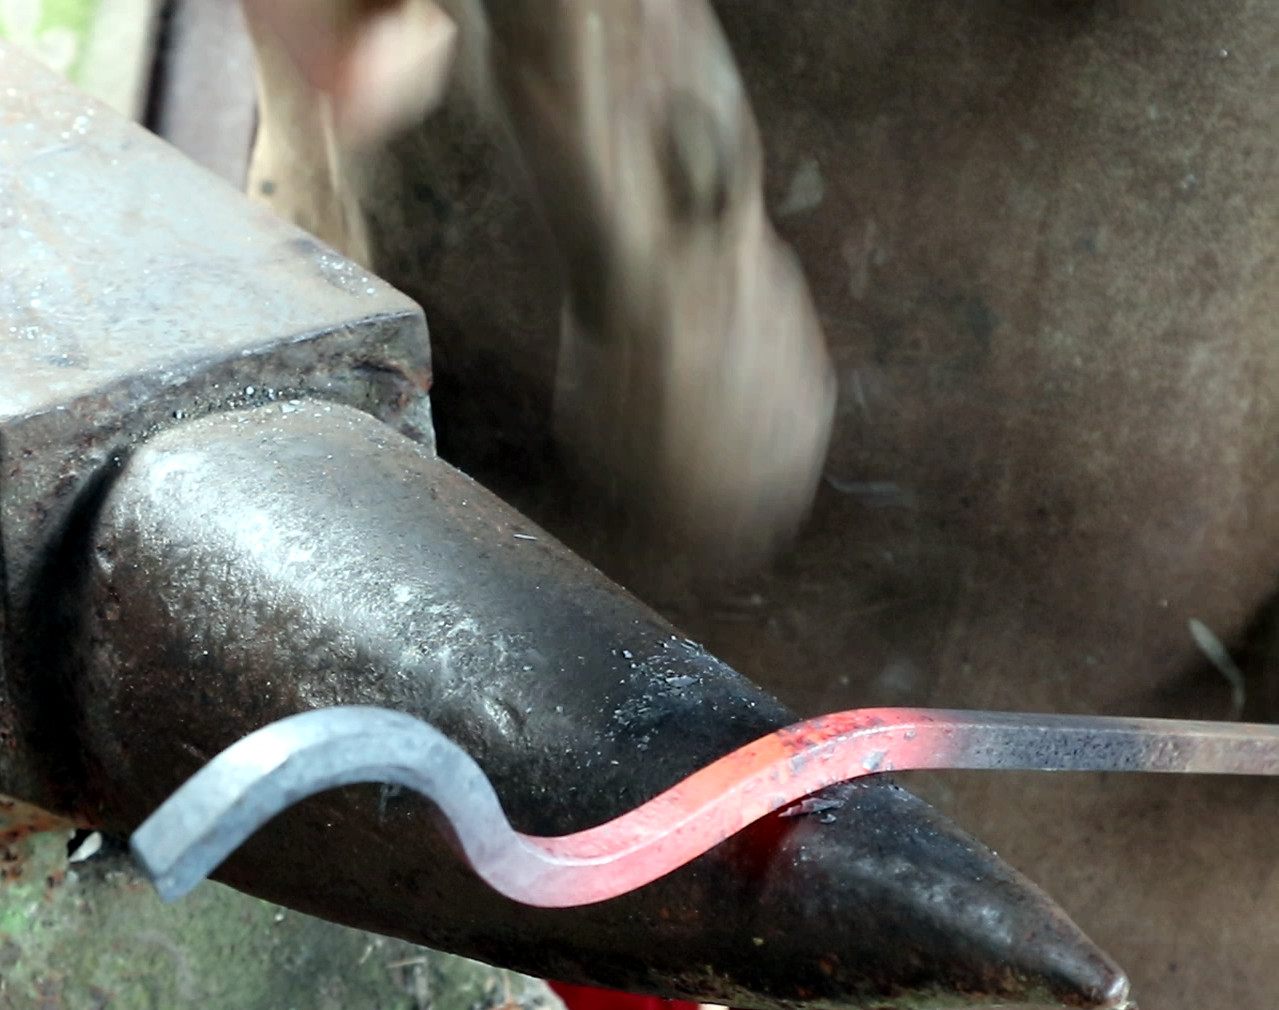
Once you’ve got the hang of curves, this is where you can start to experiment and have some fun. Have a go at S shapes, compound curves, and even scrolls if you like. It’s easy enough to undo your experiments and try something else, simply hammer them out flat again on the face of the anvil and start again. Take your time, get creative, and get a feel for how the steel works on the anvil.
Better Put a Ring On It

Having mastered bending metal, have a go at making a ring on the end of a piece of straight steel stock. You’ll be familiar with the relationship between diameter and circumference of a circle being Pi. Estimate a length that is about 3.141 times your desired radius of the ring. This 3:1 ratio is much easier to estimate than trying to envision the length of a finished curve.
The first part of making your ring is to put a right-angle bend in the steel to make an “L” shape for the base of the ring.
Making a right angle is easy enough, simply heat up the area about 25mm (1″) either side of the position you want to see the bend, lay the piece of stock across the face of the anvil, and hammer it down over the side of the anvil. You’ll have to do some hammering flat around the bend to make it a sharp 90-degrees, as it will at first try to be a sharp curve rather than a point. It may also “pinch” outwards at the corners or even bend outwards slightly away from the right angle, simply hammer that flat on the fact of the anvil.
A Trip Around the Horn
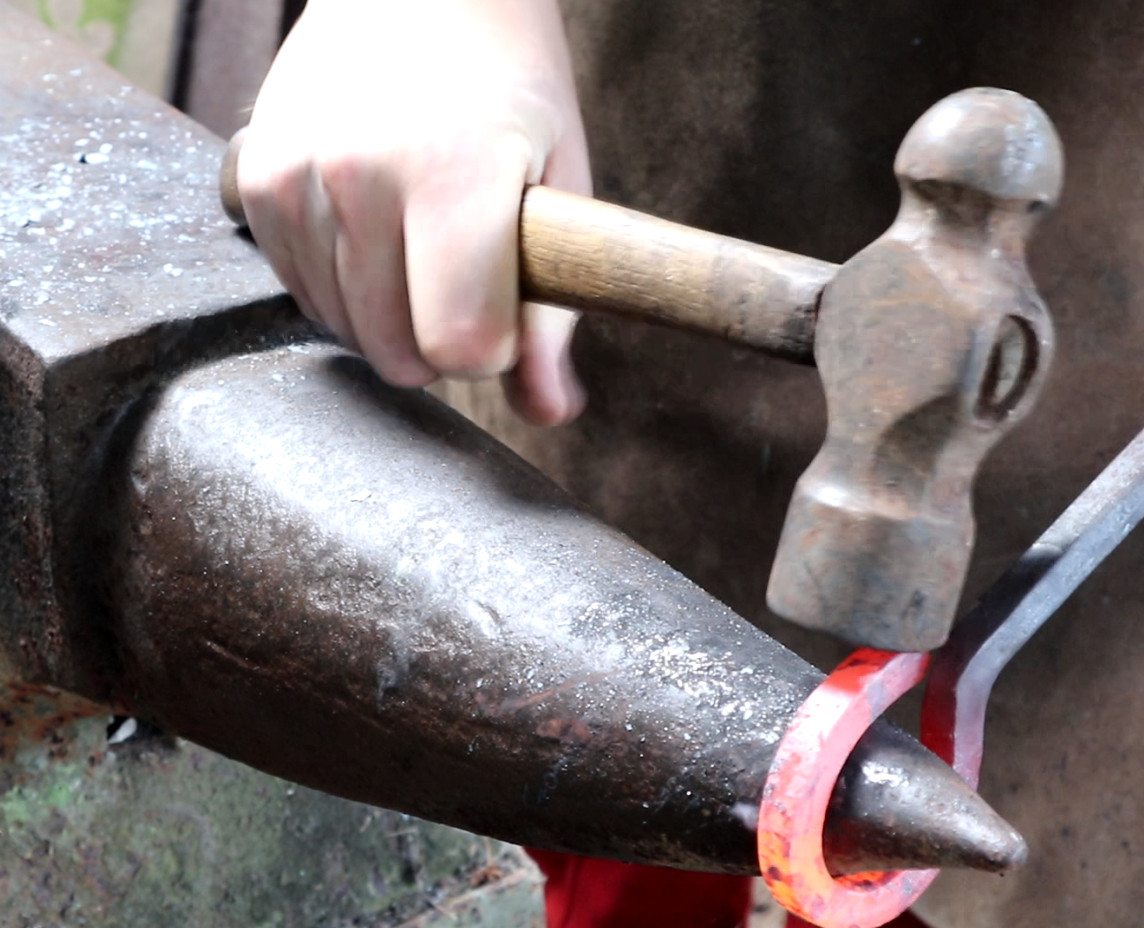
Heat up the foot of the “L”, and take care not to heat up the steel beyond the right angle. You may wish to carefully quench any other parts that have been heated up, leaving only the foot of the “L” at temperature. Then lay the hot part across the horn of the anvil with the cold side of the right angle at 90 degrees to the horn, and hammer a curve round the horn. Continue it round until it touches the right angle. You may have created an oval or a spiral, but that doesn’t matter. You can flatten any spiral tendencies out of the plane of the ring on the face of the anvil, and the next step will render it into a perfect circle.
Your imperfect ring should now be heated up again, once more as much as possible keeping the heat from going up the shaft. Then place it over the end of the horn and hammer it to a circle around it. You may need a few cycles of hammering any spiral tendencies flat, or gently hammering a gap closed if one opens up, but you should eventually be able to make a pretty good circular ring on the end of your piece of bar.
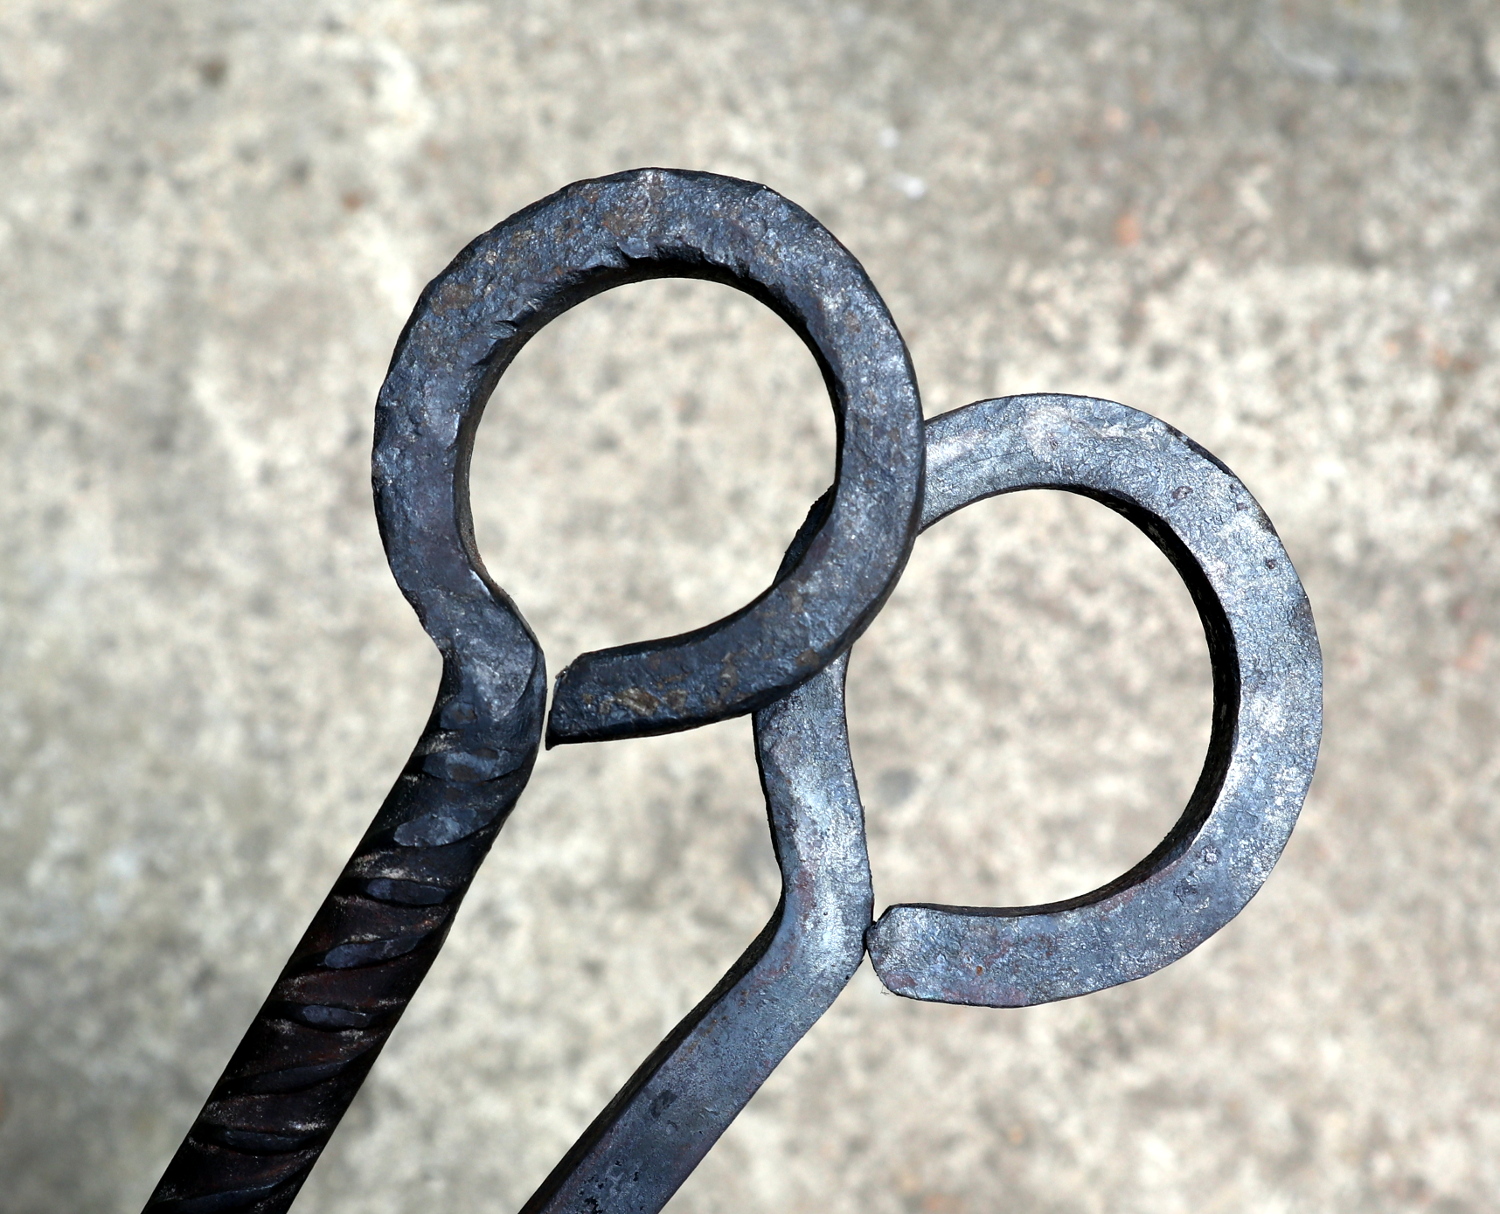
This should provide plenty of scope for experimentation with curves and rings, but it’s by no means the entire scope. You might for instance want to decrease the size of the stock in a taper over 100mm (4″) or so (See the previous piece on putting new profiles on a piece of stock or making a point for ideas how you might do that), and then create a decreasing radius curve with that. It’s not too difficult to create the traditional shepherd’s crook design in this way, for example, or to move towards the kind of decorative scrollwork you might see in blacksmith-made gates and railings.
There’s a wealth of interesting things to learn in the blacksmith’s shop and I plan to help demystify the craft and encourage readers to give it a go. Perhaps in a few decades some of you will be passing it on to a fresh cadre of interested hardware hackers. I’ll be back soon with another installment, I’m thinking of tackling the thorny subject of hardness, changing the properties of a piece of steel through heat. See you next time!