For the past few months we’ve been running this series of Blacksmithing For The Uninitiated posts, exploring the art of forge work for a novice. It’s based upon my experience growing up around a working blacksmith’s business and becoming an enthusiastic if somewhat inexpert smith, and so far we’ve spent our time looking at the equipment you might expect to need were you embarking on your own blacksmith work. Having assembled by now a basic forge of our own it’s now time to fire it up and take to the anvil for our first bit of smithing.
Lighting a forge is easy enough. Some people do it with a gas torch, but I break a piece of firewood into sticks using a hammer with the fuller set in the hardy hole on the anvil as an impromptu splitter. Making a small fire by lighting some paper under my pile of sticks placed on the hearth next to the tuyere I start the blower and then pile coke on top of the resulting conflagration. After about ten minutes I will have a satisfying roar and a heap of glowing coals, and as they burn there will be some slag collecting in the bottom of the fire that I will eventually need to rake out.
Think About The Steel You Use
For your first experiment, select a piece of steel stock about 10 mm (3/8″) in diameter, either square or round, it doesn’t matter. I suggest one 300 mm (1′) or more long, such that you can handle the cold end without needing tongs. You will no doubt try a variety of materials depending upon what comes your way and you will discover what works best for you. Harder steels are correspondingly more difficult to work, so sometimes lower quality stock may be better for experimentation.
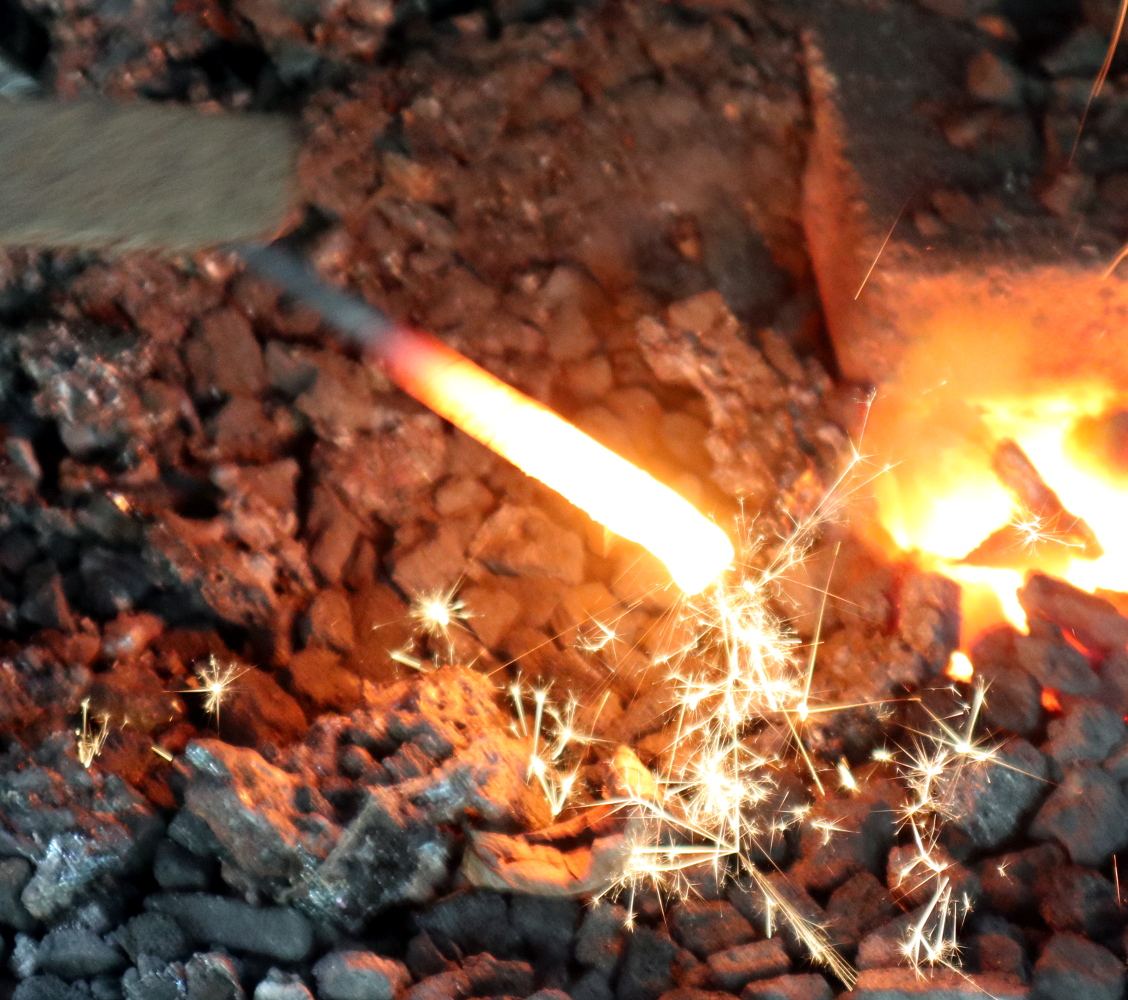
If you place the end of it, about 25 mm (1″) or so, into the hottest part of the fire where it is bright yellow, you can watch as it comes up to temperature. Ideally you want it to reach the point of being nearly but not quite as yellow as the coals around it at which point you can withdraw it and start work. If you leave it in too long it will first start to burn such that it will be sparking like a firework sparkler when you withdraw it, and if you leave it in longer still it will start to melt.
Your First Stroke Of The Hammer
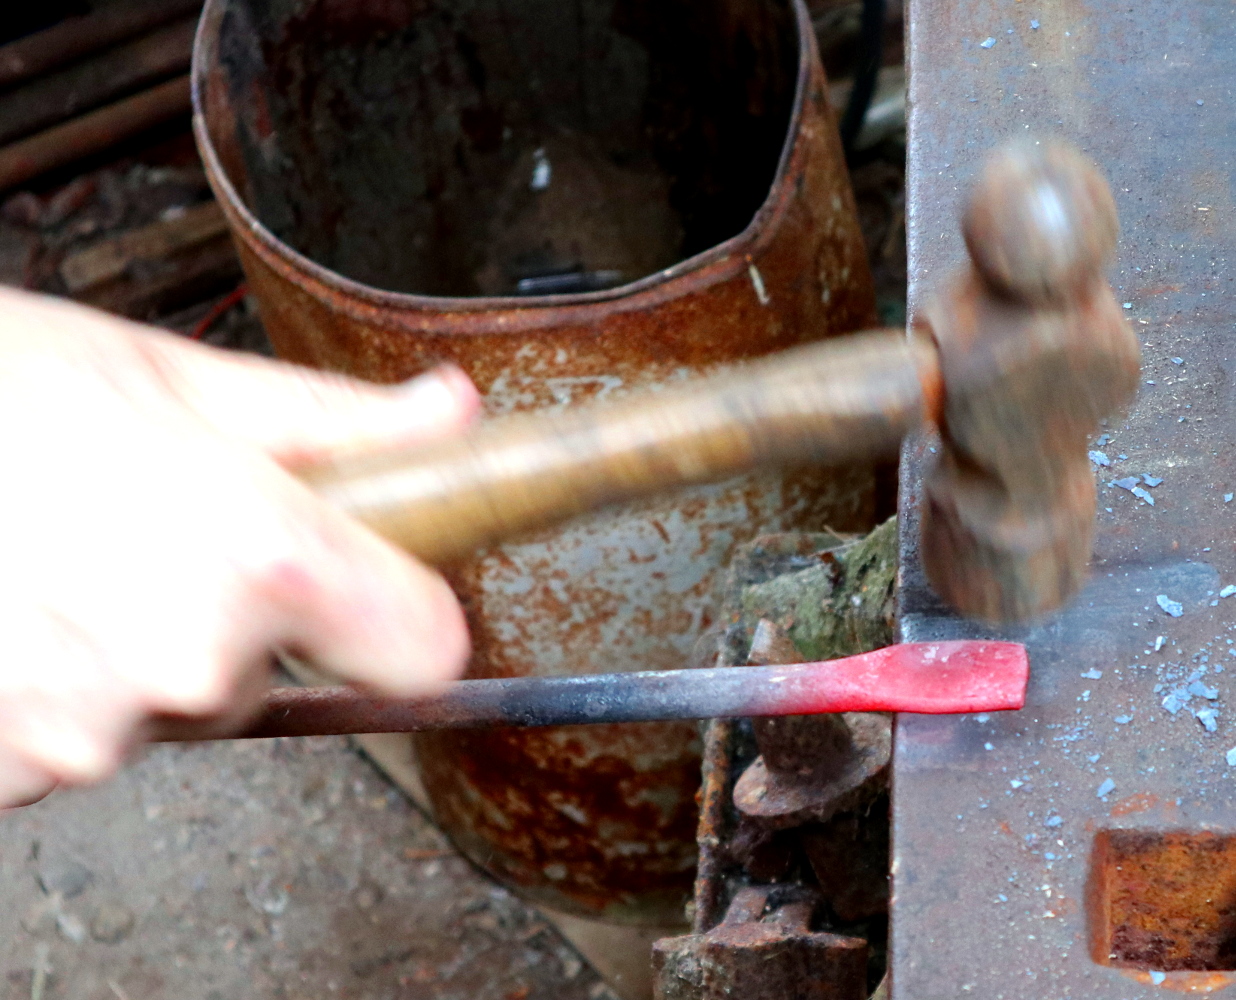
Given a piece of 10 mm steel with its end 25 mm yellow-hot, holding it by the cold end you can place it on the face of the anvil. Hammer the hot end repeatedly in the same place, and it will start to spread out. You’re not making anything here, instead it’s a simple exercise in getting used to both the metal and the hammering motion. Instead of lifting the hammer high for each stroke in the stereotypical image of a blacksmith, you are aiming to create a rhythm with it in your lower arm and wrist, taking full advantage of the rebound we mentioned when we looked at what makes a good anvil. As you hammer, you will see the work lose temperature, it will change from yellow through orange and red to a dull red with grey seeping in. At this point you will need to put it back in the coals as described above to bring it back up to temperature, and repeat the process.
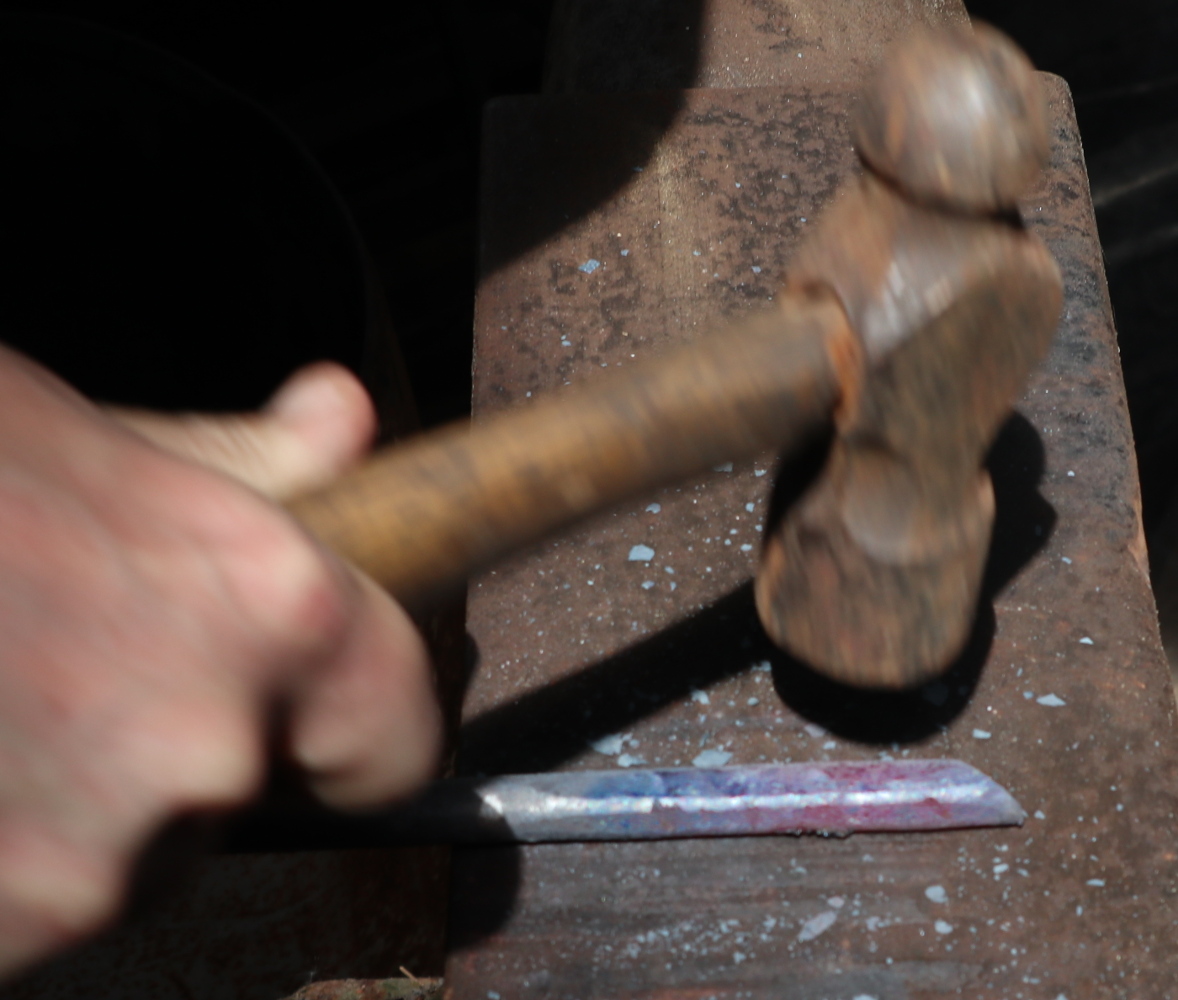
As you continue hammering, if you are consistent you will see the end of the stock flatten out until eventually it will be a flat piece of steel on the end of your stock. It probably won’t be a consistent shape and you haven’t yet made anything useful, but you’ve started to gain a feel for both the metal itself and the hammering motion required. Quench it in a vat of water so it is cool enough that you can handle it and you will see that some grey oxides have flaked off its surface, this is normal.
From Round To Square, Or Vice Versa
Now you have a bit of a feel for the metal, it’s time to learn something a little more useful. Take the other end of your piece of stock whose end you’ve just flattened, and heat it up in the coals as before for about 50 mm (2″). If it’s a square piece of stock you’re going to make it round, and conversely if it’s round you’ll hammer it square. Lay it down on the face of the anvil, and give it a set of blows with the hammer evenly spread across its length. If you continued you would end up with a longer flattened piece of metal as before, but in this case you are going to turn the stock as you hammer.
If it is a round piece you’ll hammer one face until it starts to flatten slightly before rotating it through 90 degrees and hammering the other, while if it’s a square one you’ll first hammer it on its corners to round them off, and then consistently rotate it as you hammer to ensure that the blows are distributed evenly across its surface. You may find that it starts to bend as you do this, in that case simply lay it on the face of the anvil in the axis you want to straighten, and hammer it flat. Throughout this process you’ll need to continue to return it to the fire to heat it up again, and you may surprise yourself by discovering that a lighter touch is needed with the hammer than you expect.
Eventually you will find yourself with either a newly squared piece on the end of a round piece of stock, or conversely a rounded piece on some square stock. There’s no shame in getting it wrong and trying again multiple times, but you will get the hang of it before too long. You will have learned more about the feel of the metal and the hammer, and what kind of effort is required in the process.
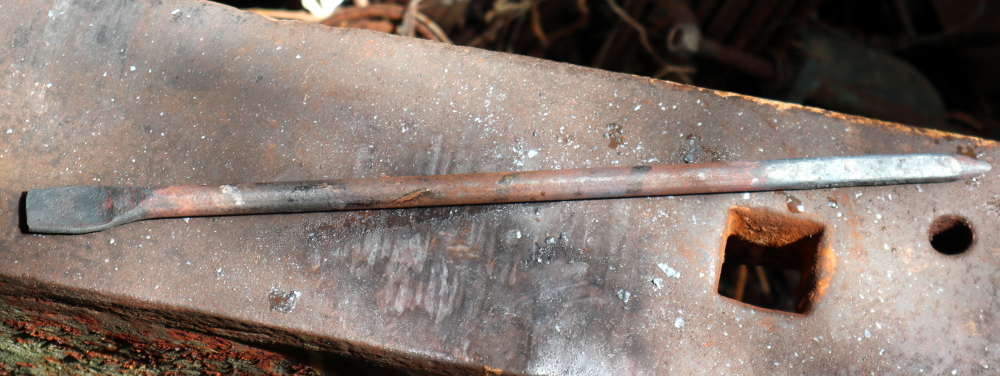
Giving It All A Point
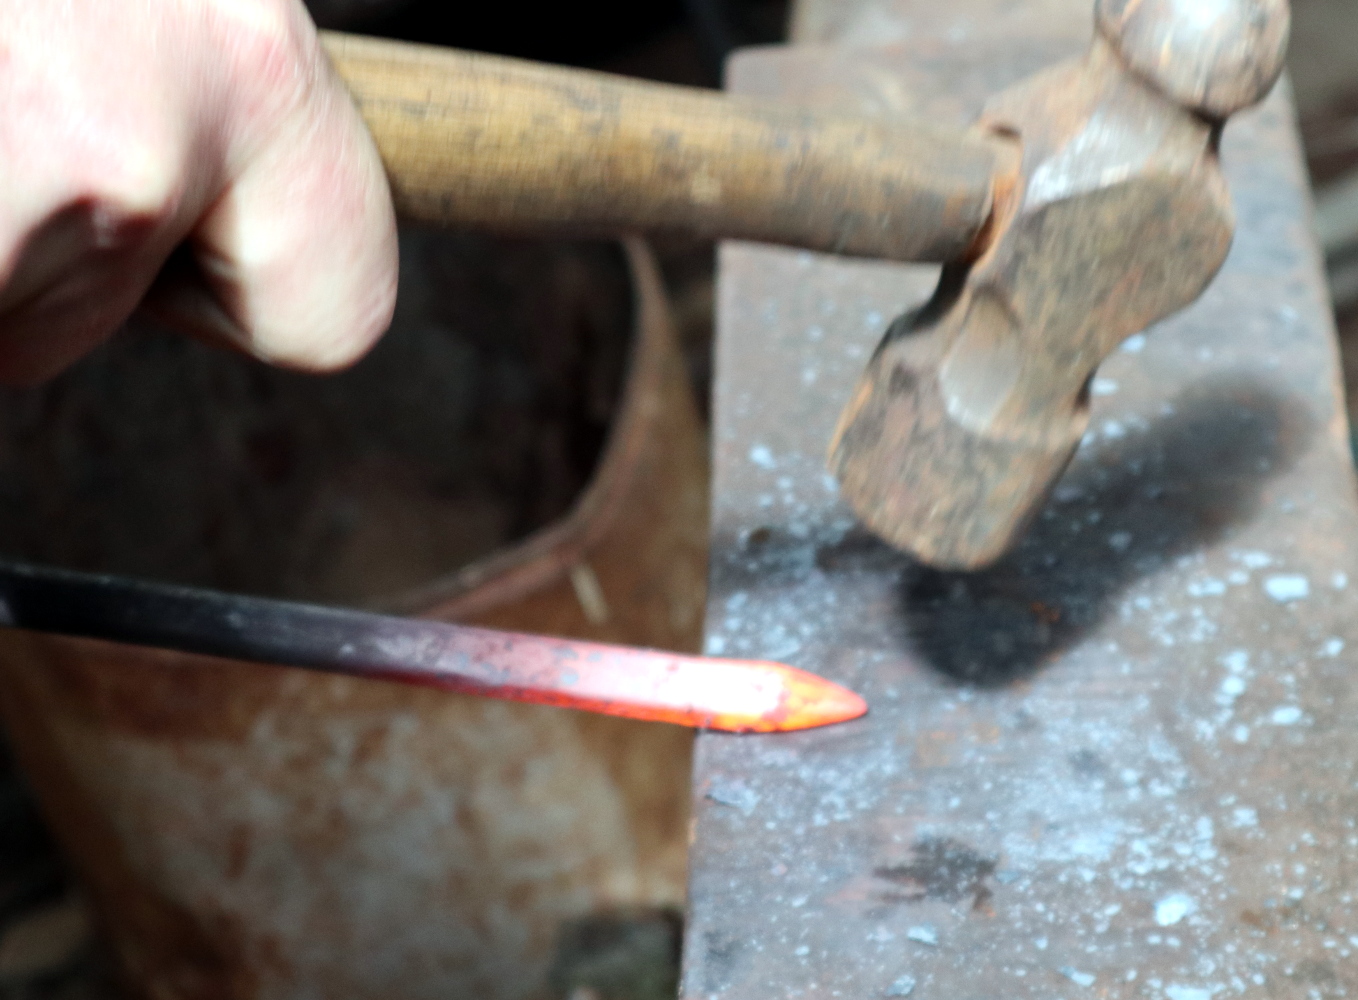
Finally for today, you’ll put a point on your newly squared-or-rounded piece of stock. Heat up the end 25 mm, and place its tip on the face of the anvil at an angle of about 20 degrees. Hammer at right angles onto its very end as you slowly rotate it, and you will see a point beginning to form. As you work the hammering back from the point it will become more pronounced. You’ll never get it to a pencil-like sharpness, but with a bit of practice you can produce a consistent result. Quench it, and all being well you should have a piece of stock with a leaf-like flat piece on one end, and a point on the other. You haven’t really made anything useful, but you have already learned quite a bit of basic blacksmithing.
This series will continue with more basic blacksmithing techniques, in the next installment we’ll have a go at bending steel, making curves, loops, and scrolls. You won’t be an expert blacksmith just yet, indeed though having grown up around expert blacksmiths I am not one of them either, however as you proceed you should amass a set of basic skills upon which you can build the ability to make more complex pieces of work.
My thanks to Henry List for taking the pictures used in this piece.